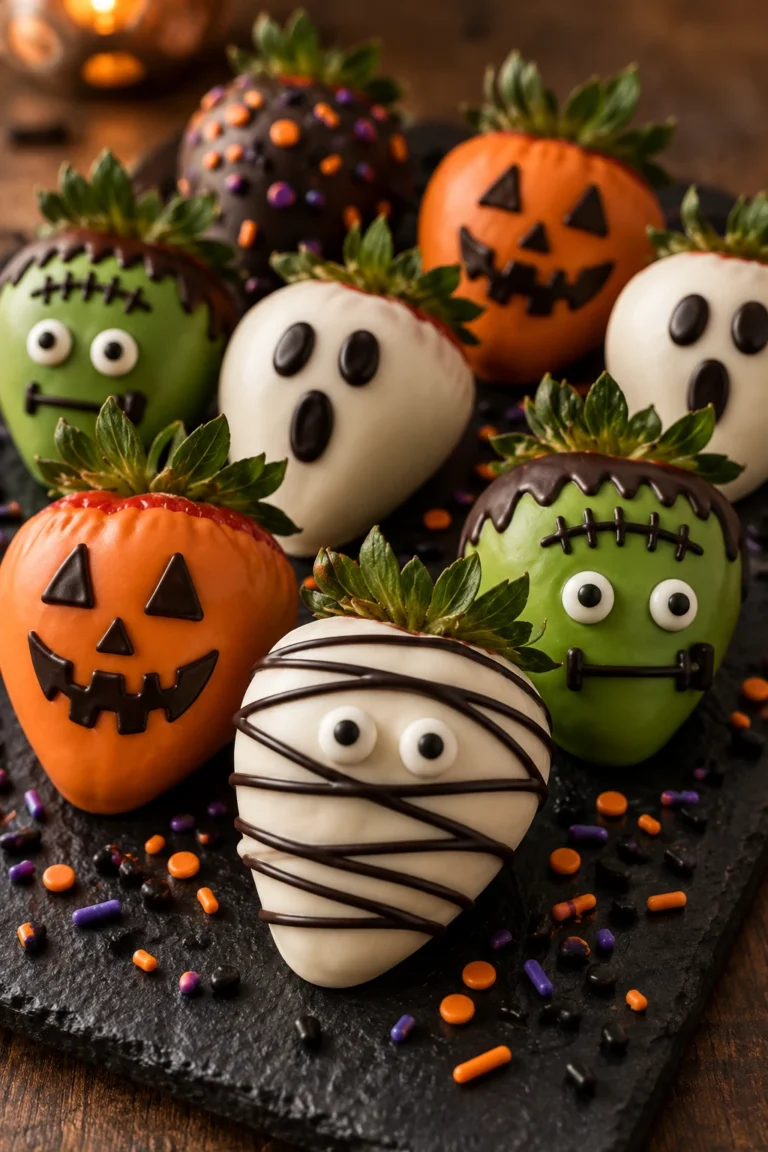
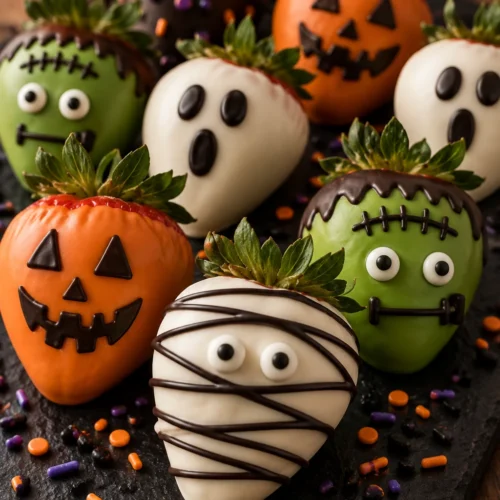
Every October, one treat steals the spotlight at Halloween parties, classroom events, and spooky dessert tables — Halloween chocolate covered strawberries. These frightfully fun treats combine fresh, juicy strawberries with a smooth candy coating decorated as mummies, ghosts, jack-o’-lanterns, and Frankenstein monsters. They look incredibly impressive, yet they come together with just a handful of ingredients and no baking required. Whether you’re making them for a crowd or a cozy night in, this step-by-step guide walks you through everything you need to know.
Reasons to Try Halloween Chocolate Covered Strawberries
There are so many reasons to add these spooky treats to your Halloween lineup this year:
- No baking required. The whole project happens on your countertop — no oven, no complicated equipment, just melted chocolate and a little creativity.
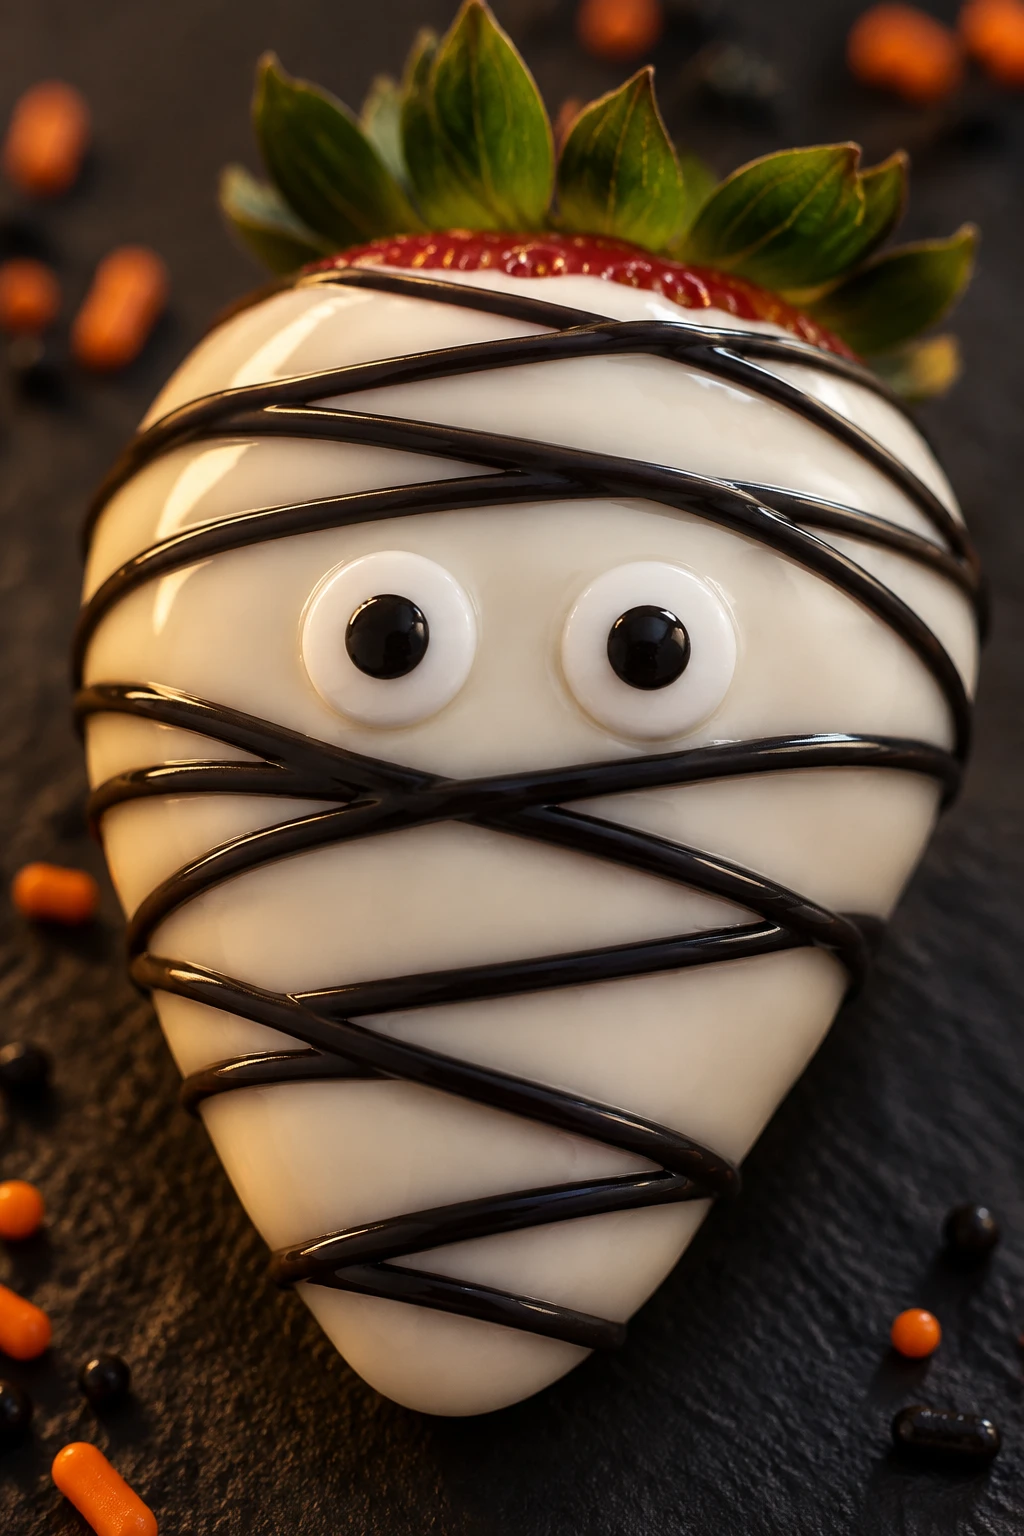
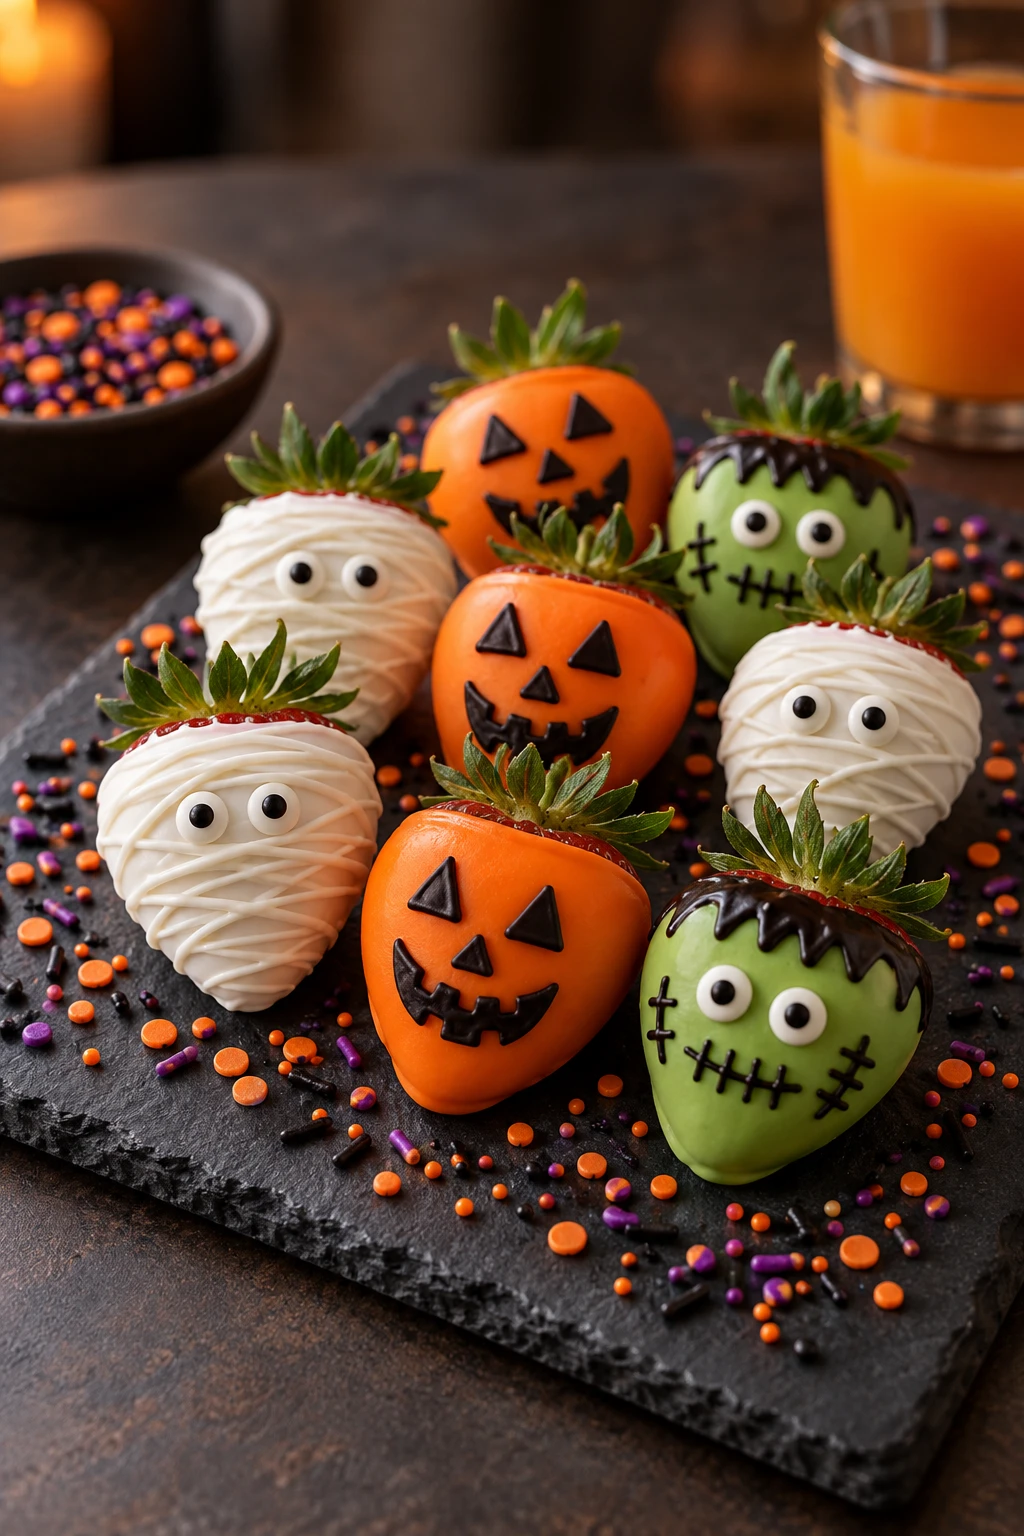
- Endlessly customizable designs. Mummies wrapped in white chocolate bandages, wide-eyed ghosts, grinning jack-o’-lanterns, and green Frankenstein faces — you can make as many or as few designs as you like in one batch.
- A crowd-pleasing flavor combination. The natural tartness of fresh strawberries pairs beautifully with the sweetness of white or dark chocolate, creating a balanced bite that’s never too heavy or too rich.
- Great for all skill levels. Kids can help press in candy eyes and sprinkles while the chocolate is still wet, making this a wonderful activity for the whole family.
- Impressive presentation with minimal effort. Arrange them on a dark slate board or a Halloween-themed platter and they instantly look like something from a professional candy shop.
- A fresher alternative to heavy desserts. Compared to brownies, cakes, or fudge, these treats offer a lighter, fruit-forward option that still feels festive and indulgent.
 Save
SaveIngredients Notes
- Fresh strawberries — large, firm berries with intact stems work best for dipping
- White chocolate chips, bar, or candy melts — the base coat for most designs
- Dark or black candy melts — used for detail piping, spider webs, and faces
- Candy eyes — pressed in while the chocolate is still soft
- Parchment or wax paper — essential for a non-stick drying surface
- Oil-based food coloring in Halloween shades — must be oil-based to prevent chocolate from seizing
- Coconut oil or vegetable oil — thins the chocolate for a smooth, even dipping consistency
- Orange candy melts — for pumpkin designs
- Green candy melts — for Frankenstein designs
- Halloween sprinkles — pressed into the wet chocolate for extra decoration
- Black writing gel or gel pen — used to draw on facial details after the chocolate sets
How to Make Halloween Chocolate Covered Strawberries
- Wash and thoroughly dry all strawberries, then let them rest at room temperature for at least 30 minutes.
- Line a large baking sheet with parchment paper and prepare piping bags for detail work.
- Melt white chocolate with coconut oil in the microwave using 20-second bursts on half-power, stirring between each interval.
- Divide the melted chocolate into small bowls and stir in oil-based food coloring to create your desired Halloween colors.
- Hold each strawberry by the stem, dip into the colored chocolate, let the excess drip off, then place on the parchment-lined tray.
- Immediately press candy eyes or sprinkles into the wet chocolate before it sets.
- Let the base coat set at room temperature for 10–15 minutes until firm and matte.
- Melt dark or black candy melts and pipe on design details — mummy lines, spider webs, ghost expressions, or pumpkin faces.
- Allow all detail piping to set at room temperature, then serve or store loosely covered on the parchment tray.
What You Must Know About Halloween Chocolate Covered Strawberries
Before you begin, keep these critical points in mind to make sure your strawberries turn out perfectly every time:
- Dry strawberries are non-negotiable. Moisture is the number one reason chocolate won’t adhere to the berry. Wash them, pat each one individually, and let them rest for at least 30 minutes before dipping. Even a small amount of water on the surface will cause the coating to slide right off.
- Oil-based food coloring only. This is critical. Standard water-based or gel food colorings sold for cake decorating contain water, which will cause your melted chocolate to seize instantly into a grainy, unworkable mass. Look specifically for oil-based candy coloring at craft or baking supply stores — or simply use pre-colored candy melts.
- Never rush the base coat. The 10–15 minute setting time between your base coat and your detail piping is not optional. Piping over a soft or still-tacky base will cause the colors to bleed and your designs to look smudged.
- Do not refrigerate. Chocolate and refrigerators don’t mix well for this recipe. Cold temperatures cause condensation, which leads to a sweaty, cracked chocolate shell and a dull, streaky appearance. Room temperature storage is always the right call.
- Work one berry at a time when adding decorations. White chocolate sets quickly, especially in a cool kitchen. Dip, place, and immediately add your candy eyes or sprinkles before moving on to the next berry.
- Thin your chocolate if needed. If the melted chocolate feels too thick for smooth dipping, stir in an extra small amount of coconut oil — but add it gradually. Too much oil will make the coat too thin to hold decorations.
- Prep your piping bags in advance. Have your zip-lock or piping bags ready to fill before you melt the detail chocolate. Candy melts set faster than you expect, and fumbling with bags while chocolate firms up wastes precious decorating time.
Variations and Substitutions
- No candy melts? Use white chocolate bars. Good-quality white chocolate bars melt smoothly and taste richer than candy melts. Just be sure to add a teaspoon of coconut oil to keep the consistency dip-friendly.
- Swap designs to match your crowd. Not feeling mummies? Try Dracula-inspired berries dipped in red-tinted white chocolate with a black cape piped in dark chocolate, or go full witch with purple-coated berries and a tiny candy hat pressed on top.
- Use milk or dark chocolate as the base. White chocolate is the most versatile for coloring, but a dark chocolate base gives a more grown-up, slightly bitter flavor that pairs beautifully with the strawberry’s tartness — perfect for adult Halloween parties.
- Make them dairy-free. Use dairy-free white chocolate chips or vegan candy melts to make these suitable for guests with dairy restrictions. The method stays exactly the same.
- Add a flavor twist. Stir a tiny drop of peppermint, almond, or orange extract into the melted chocolate before dipping for an unexpected and delicious flavor boost.
- Try other fruits. The same technique works beautifully with pretzel rods, Oreo cookies on a stick, or even banana slices for a fun Halloween treat variety platter.
- Can’t find candy eyes? Use small white nonpareils with a dot of black writing gel in the center as a homemade substitute, or pipe tiny white and black dots directly with chocolate.
Serving Suggestions for Halloween Chocolate Covered Strawberries
These spooky strawberries are stunning on their own, but a little styling goes a long way:
- Halloween dessert board. Arrange the finished strawberries on a black slate board or a dark wooden platter alongside orange and black candy corn, chocolate truffles, and ghost-shaped marshmallows for a dramatic spread.
- Party favor packaging. Line small clear treat bags with tissue paper, place 3–4 strawberries inside, and tie with an orange or black ribbon for adorable Halloween party favors that guests will love.
- Dessert table centerpiece. Stand the strawberries upright in a foam block covered with crinkled black tissue paper inside a cauldron-shaped bowl — they’ll look like they’re sprouting right out of a witch’s pot.
- Paired with drinks. Serve alongside hot apple cider, warm spiced hot chocolate, or a Halloween punch bowl. The fruity freshness of the strawberries complements warm, spiced beverages perfectly.
- Garnish for a cake or cupcake platter. Stand 3–4 decorated strawberries upright around a Halloween cake as edible decorations that guests can snack on.
- Kid-friendly activity station. Set up an assembly line with dipped berries, bowls of sprinkles, and candy eyes so kids can decorate their own spooky strawberry at a Halloween party — a fun, edible craft project.
 Save
SaveStorage and Reheating
These strawberries are at their absolute best when served fresh, but here’s how to keep them at their peak if you need to make them ahead:
- Room temperature storage (recommended): Place finished strawberries on the parchment-lined tray, cover loosely with plastic wrap, and keep at room temperature. They will stay fresh and the chocolate will remain smooth and glossy for up to 12–24 hours.
- Do not refrigerate. Cold air causes moisture to form on the chocolate surface, creating a streaky, sweaty coating and potentially cracking the shell. Avoid the fridge entirely if possible.
- If you must refrigerate: Store in a single layer in an airtight container (never stacked). Allow them to come back to room temperature for 15–20 minutes before serving to minimize sweating. Consume within 24 hours.
- Make-ahead tip: Wash and dry your strawberries the night before and store them uncovered in the fridge. Dip and decorate the morning of your event so they’re fresh and the chocolate designs are at their sharpest.
- Freezing is not recommended. Frozen strawberries release liquid as they thaw, which causes the chocolate to completely separate from the fruit.
Reheating does not apply to this recipe — these treats are served at room temperature and are not meant to be warmed.
Frequently Asked Questions about Halloween Chocolate Covered Strawberries
Why is my chocolate sliding off the strawberries?
This almost always comes down to moisture. Even a tiny amount of water on the surface of the berry will prevent the chocolate from bonding properly. Make sure to pat each strawberry dry individually with paper towels and let them rest at room temperature for at least 30 minutes before you start dipping.
Can I use regular food coloring to tint the white chocolate?
No — you must use oil-based food coloring only. Standard water-based or gel food colorings contain water, which causes melted chocolate to seize immediately into a thick, grainy clump. Look for oil-based candy colors at baking supply stores, or use pre-colored candy melts to avoid the issue entirely.
How far in advance can I make Halloween chocolate covered strawberries?
These are best made the same day they’re served. You can make them up to 24 hours in advance if needed, but store them at room temperature (not in the fridge) loosely covered with plastic wrap. The fresher they are, the better the texture of both the berry and the chocolate shell.
My chocolate turned thick and lumpy when I melted it — what went wrong?
This is called seizing, and it happens when chocolate overheats or comes into contact with any water. Always melt in short 20-second microwave bursts on half-power, stirring between each. Make sure your bowl and spoon are completely dry before you start. Adding 1 tsp of coconut oil before melting also helps keep the texture smooth.
Can I use milk or dark chocolate instead of white chocolate?
Absolutely. Milk and dark chocolate both work wonderfully as a base coat and give a richer, less sweet flavor. Keep in mind that you won’t be able to tint dark chocolate with food coloring — it simply won’t show. Dark chocolate works best for designs where the natural brown color fits, or as the detail piping chocolate over a white or colored base.
Why did my chocolate shell crack or look sweaty after I put them in the fridge?
Refrigeration causes condensation to form on the chocolate surface as cold air meets the coating, which leads to sweating, cracking, and a dull appearance. Always store finished strawberries at room temperature, loosely covered, until you’re ready to serve them.
What designs are easiest for beginners?
Mummies and ghosts are the most beginner-friendly. For mummies, simply drizzle zigzag lines of white chocolate over a white-coated berry and add two candy eyes. For ghosts, dip in white chocolate, add candy eyes while wet, and once set use black writing gel to draw a spooky open mouth. Both require minimal piping skill and look fantastic with very little practice.
Can I make these without candy melts?
Yes. Good-quality white chocolate chips or chopped white chocolate bars work just as well as candy melts and often taste better. Add 1 tsp of coconut oil per 8 oz of chocolate to help it melt smoothly and achieve the right dipping consistency. For colored coatings, tint the melted white chocolate with oil-based food coloring.
Nutrition Facts (Per Serving)
| Nutrient | Amount Per Serving (1 strawberry) |
|---|---|
| Calories | 75 kcal |
| Total Fat | 4 g |
| Saturated Fat | 2.5 g |
| Total Carbohydrates | 9 g |
| Sugar | 8 g |
| Fiber | 0.4 g |
| Protein | 0.8 g |
| Sodium | 12 mg |
| Values are estimates and may vary based on exact ingredients and portion sizes. | |
Halloween Chocolate Covered Strawberries
Ingredients
- 1 lb approx. 20–24 medium-large berries Fresh strawberries (large, with stems) (Must be fully dry and room temp before dipping)
- 8 oz White chocolate chips, bar, or candy melts (Base coat for mummies, ghosts, pumpkins, Frankenstein)
- 1 –2 oz Dark or black candy melts Used for spider webs, faces, and detail piping
- 24 –48 pieces Candy eyes Pressed in while chocolate is still wet
- 1 sheet Parchment or wax paper Prevents sticking during setting
- few drops per color Oil-based food coloring orange, green, purple, black, red (Must be oil-based; liquid coloring causes chocolate to seize)
- 1 tsp Coconut oil or vegetable oil Thins chocolate for smooth dipping consistency
- 2 –3 oz Orange candy melts For pumpkin design; can substitute white choc + orange coloring
- 2 –3 oz Green candy melts For Frankenstein design
- 2 –3 tbsp Halloween sprinkles Add while chocolate is still wet
- 1 tube Black writing gel or gel pen For drawing faces after chocolate sets
Instructions
- Rinse all strawberries under cold water, then pat each one completely dry with paper towels — every drop of moisture must be removed. Lay them on a clean dry towel and let them air-dry at room temperature for at least 30 minutes. Checkpoint: You are ready to move on when the berries show zero surface moisture and feel completely dry to the touch.
- Line a large baking sheet with parchment or wax paper and set it near your workspace. Prepare 2–3 small zip-lock bags or piping bags for detail work by snipping a tiny corner off each one when ready to use.
- Place 8 oz of white chocolate and 1 tsp of coconut oil in a microwave-safe bowl. Microwave on half-power in 20-second bursts, stirring thoroughly between each interval. Repeat until the chocolate is fully melted, glossy, and smooth — about 60–90 seconds total. Do not overheat. Checkpoint: You are ready to move on when the chocolate flows off a spoon in a smooth, steady ribbon with no lumps and reaches about 110°F.
- If making multiple designs, divide the melted white chocolate into separate small bowls — one for each color. Add a few drops of oil-based food coloring to each bowl and stir until the color is completely even, about 2–3 minutes. Melt orange and green candy melts separately using the same microwave method if using them for pumpkin or Frankenstein designs.
- Hold one strawberry firmly by its green stem or leaves. Submerge it nearly to the top in your chosen color of chocolate. Rotate the berry gently to coat all sides evenly, then lift it and hold it above the bowl for 3–5 seconds to let the excess chocolate drip off. Checkpoint: You are ready to move on when the berry is coated with a smooth, even shell and no large drips are forming at the base.
- Place the dipped berry immediately onto the parchment-lined tray. While the chocolate is still wet (work quickly, one berry at a time), press 1–2 candy eyes firmly into the surface or sprinkle Halloween sprinkles over the top so they adhere. Repeat for all berries.
- Allow all base-coated berries to set at room temperature for 10–15 minutes. Do not refrigerate. Checkpoint: You are ready to move on when the chocolate shell feels completely hard and matte to the touch and does not leave a fingerprint when lightly pressed.
- Melt 1–2 oz of dark or black candy melts in a small bowl using the same 20-second microwave burst method. Transfer to a piping bag or zip-lock bag with a tiny corner snipped. Pipe your detail designs over the set base coats: horizontal bandage lines for mummies, swirling spider webs, dot-and-line ghost faces, or triangular pumpkin features. Take your time — fine, steady lines look the most impressive.
- Let all detail piping set at room temperature for another 5–10 minutes. Once fully firm, use black writing gel to add any final facial expressions or fine details if desired. Serve immediately or store loosely covered with plastic wrap on the parchment tray at room temperature for up to 12–24 hours.